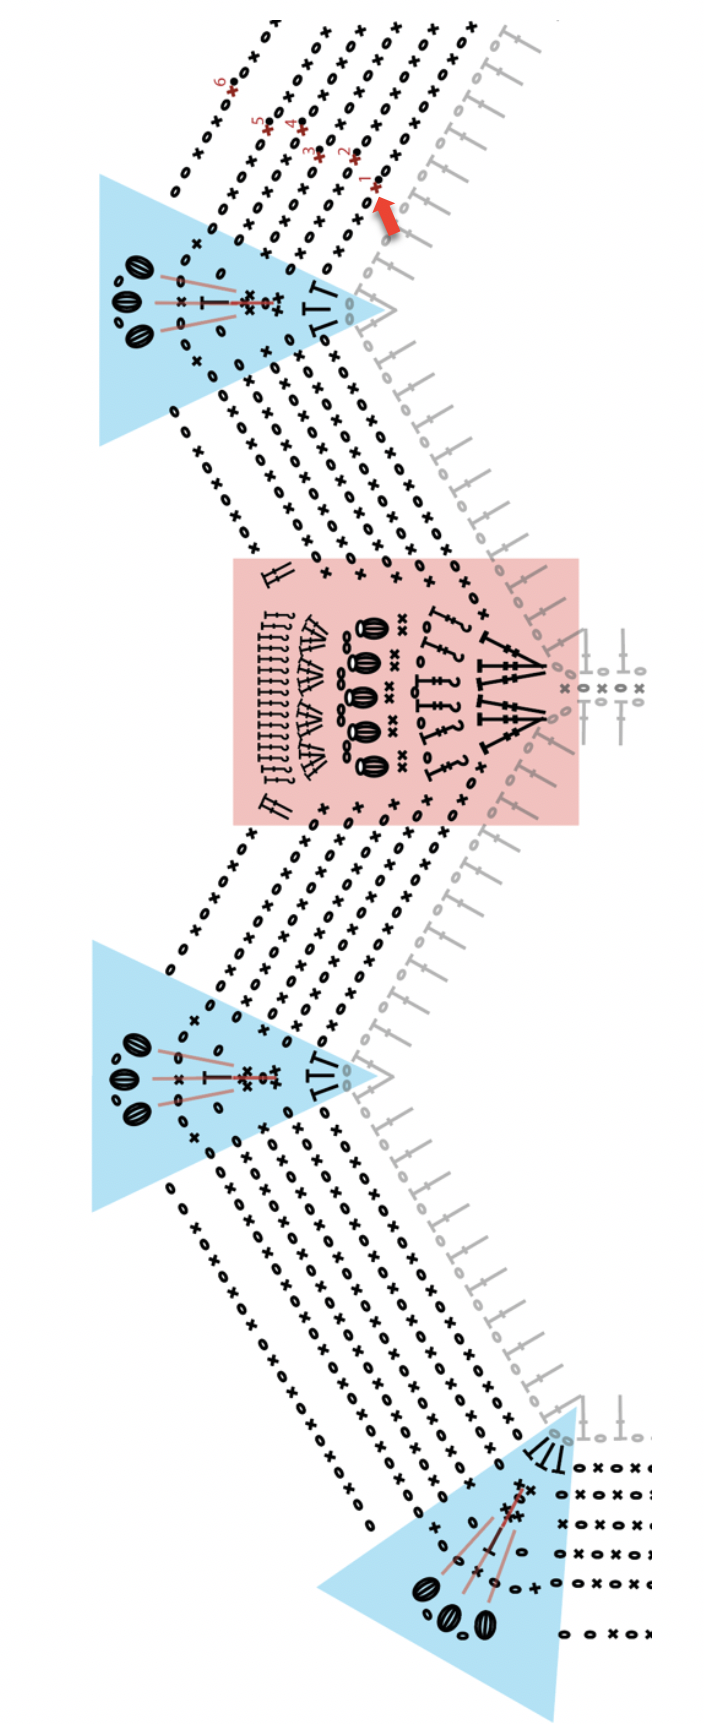
Keep on Blooming CAL - JOIN AND BORDER

#keeponbloomingcal

COPYRIGHT - This publication is protected by the Copyright Act. It is available to you free of charge. You must not modify or distribute the pattern. Reselling the free pattern in all forms (a whole set of instructions or a single part) is prohibited. Selling a finished product is prohibited unless otherwise agreed with the designer. To download pattern for private use: http://www.anceliga.fi. Sharing the pattern is not allowed. Use of instructions is forbidden in any profit-seeking context

© 2019 Anne Vierimaa / Anceliga Design, All rights reserved.

Stitches used in this pattern (US terms): 

ch - chain

ch-sp - chain space

sc - single crochet

SSsc - standing stitch single crochet**

dc - double crochet

tr - triple crochet (2 yarn over on hook)

BPtr - back post triple crochet (2 yarn over on hook)

pc - popcorn stitch**

puff  - puff stitch**

sk - skip stitch

slst - slip stitch

rnd - round

** See special stitch instructions >> Click Here <<

NOTE: Cut yarn and secure ends when changing yarn color.

JOINING THE HEXAGONS

Join flower hexagon blocks together as presented in the joining chart found below.

NOTE. If you are using the Beige - Blue yarn-kit, join flower hexagons together as presented in the Beige-Blue photo above.

Tip: Join 3 flower hexagon groups (Joining Chart, black arrows. Total on six 3 flower hexagon groups).

Join the middle part of the blanket (1 flower no. 5 + 6 flower no. 4 hexagons) together. This way you will have a great base for joining the rest of the seams together evenly.  

Continue joining hexagon blocks together as shown in the Joining Chart. 

Starting with a standing stitch single crochet, 

*Place 2 flower pieces together wrong sides together. Sc into the corner ch2-sps of both pieces. (Ch 1, sk dc, sc through ch1-sps of both pieces) 11 times. Last sc goes through the left side’s corner ch2-sps.* 

Cut yarn and secure ends OR continue in the next hexagons by repeating *-*. Repeat *-* in every seam as shown in the Joining Chart.  

Fasten off, pin in place and apply lightly steam with iron or mist with water and leave to dry.

BORDER

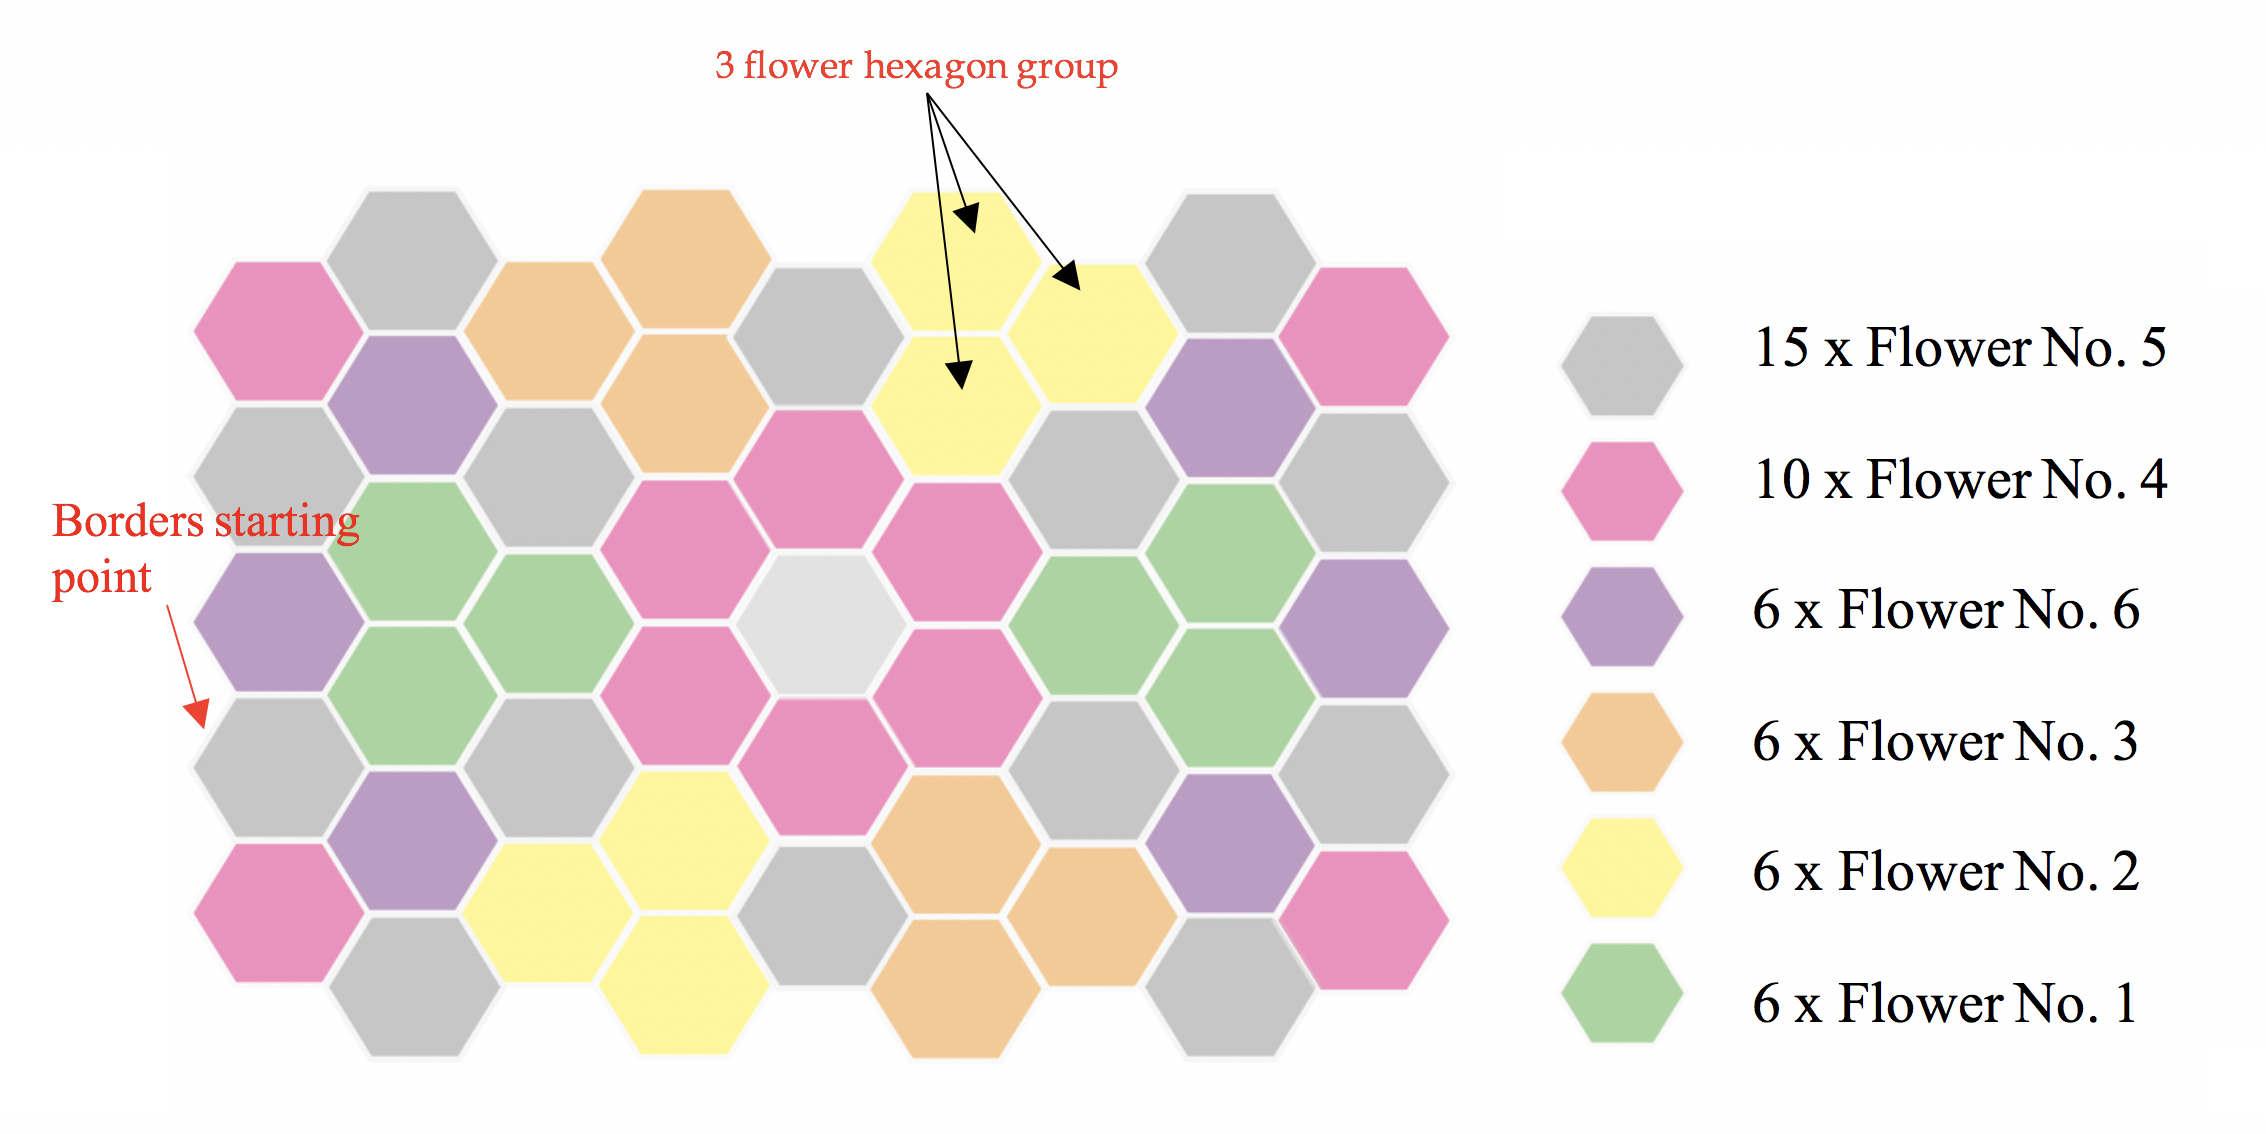
The starting point is marked on the Joining Chart (above) with red arrow. 

Start all rounds with a standing stitch, 1st sts are marked with red -X (= sc). Follow the Border Chart (below) and crochet into the hollows between the hexagons as chart point 2 and around tips of the hexagons as chart point 1.

Note: On the long side of the blanket, there are two hollows in a row (2 x chart point 2). 

Join with slst to the 1st sc after every rnd.  

Crochet by following the chart AND read the Notes below for every round.


Notifications: 

Rnd 1

Yellow 

Into tip (chart point 1) 3 hdc into ch2-sp of previous rnd.

Into hollows (chart point 2) 3 tr into ch2-sp, sk joining seam, 3 tr into next hexagon’s ch2-sp.


Rnd 2

Light Brown 

Into tip (chart point 1) (sc, ch 2, sc) into middle hdc (2nd hdc).

Into hollows (chart point 2) BPtr around every tr of previous rnd, ch 1 between every BPtr.


Rnd 3

Brick Red 

Into tip (chart point 1) 3 sc into ch1-sp.

Into hollows (chart point 2) 2 sc into every ch1-sp, sk BPtrs.


Rnd 4

Off White 

Into tip (chart point 1) hdc between 2 scs (Rnd 2) into Rnd 1 (working behind 3 sc of Rnd 3).

Into hollows (chart point 2) pc into 2nd sc which is made into ch1-sp, ch 2 between every pc.


Rnd 5

Mustard 

Into tip (chart point 1) BPhdc into hdc.

Into hollows (chart point 2) 4 dc into every ch2-sp, sk pcs.
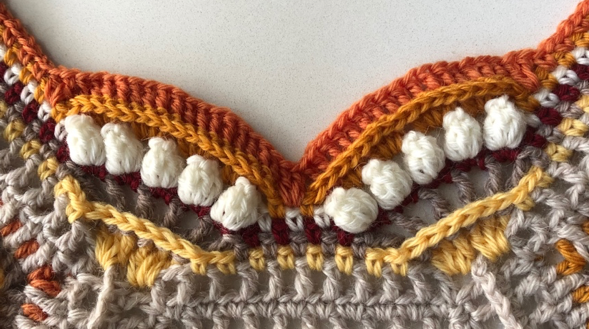
 

Rnd 6

Orange 

Into tip (chart point 1) puffs into scs of Rnd 3 (working in front of Rnds 4 and 5 sts).

Into hollows (chart point 2) 2 dc into ch2-sp, BPdc around every dc and 2 dcs into ch1-sps.

Notice: On the long side of the blanket, there are two hollows in a row (2 x chart point 2). There will be only 2 dcs between hollow points (chart point 2) see the picture bellow.

BORDER CHART

Secure ends, block, using rustproof pins, pin into place and apply light steam with iron, or mist with water and leave to dry if you choose to block your blanket.

Join the Flower Tassels into the corners of the blanket between 2 hexagons. See the picture below.  

Look how beautifully your flower meadow has bloomed.   

It has been so wonderful that you were a part of this CAL, please try my other designs as well. 

I hope to see your Keep on Blooming CAL pictures on social media.  

I love to design crochet patterns and this is available to you free of charge. Please read the Copyright text. 

Use of instructions is forbidden in any profit-seeking context


When publishing in social media please use: 

#keeponbloomingcal

 @anceligadesign  

and link to my webpage  

www.anceliga.fi 

Thank you! :)